Timeline Overview
What is it?
The Timeline Overview allows provides a quick snapshot view of the timeline and allows you to control the timeframe displayed on the timeline graph.

What you can do
The Timeline overview allows you to:
-
Adjust the timeframe:
-
Select and drag the selection frame handles
 to zoom in and out of the timeframe
 -
Use the mouse wheel inside the selection frame to zoom in and out
-
Click in the middle of the selection frame and drag it along the timeline
-
To apply zoom to the selection frame, right click in the frame and select Zoom Selection
 .
.
-
-
Adjust the datte/time range click on the calendar icon
 to Change the date/time range
 -
Create a snapshot view to display two timeframe views:
-
Adjust the selection frame to the required timeframe and then right click inside the coloured selection frame and select Take Snapshot

-
Right click inside the selection frame and select Cancel Snapshot

-
-
Reset the timeframe by right clicking and selecting Cancel Zoom

Quick Demo: Timeline Overview
Click on image to open in full window.
Zoom in and out of the timeframe
Using the Selecting Frame
Click the selection frame handles ![]()

Drag the Selection Frame
Drag the selection frame along the timeline

Use the Mouse Wheel
Zoom in and out using the mouse wheel.
The mouse can positioned over the:
-
timeline overview, within the selection frame, or
-
timeline graph.
Apply the Zoom
To apply zoom, that is to take the section selected within the frame and zoom to just that selection on the timeline, right click in the frame and select Zoom Selection .
Reset the Zoom
To cancel the zoom, right-click over the overview and select Cancel Zoom.

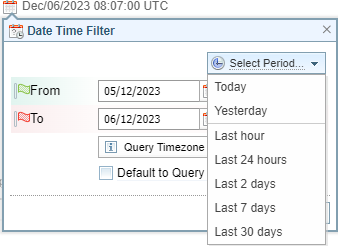
Change the date/time range
-
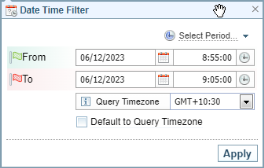
Click the Calendar icon
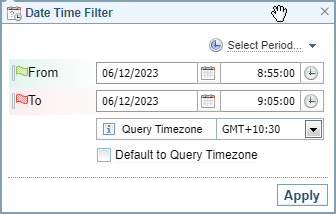
above the Overview section. Result: The Date Time Filter dialog is displayed:
-
You can either:
-
select the time and date range you want to see on the timeline.
-
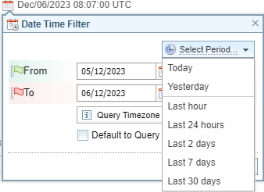
choose from a range of a predefined time periods (for example, today, yesterday, last hour, last 7 days) by:
-
selecting the Select Period dropdown, and then
-
selecting the period you want to see on the timeline.
-
-
If required, select the Query Timezone dropdown list and select a timezone.
Alternatively, you can default to your local timezone by selecting the Default to Query Timezone checkbox.
-
Click Apply.
To reset the date/time filter, right-click over the overview, and select Cancel Zoom.
Create a snapshot
The snapshot feature enables you to zoom in on a date/time range and view the range in a second overview pane:

- Right-click the overview section, and then select Take Snapshot
- Click on one of the snapshots to select that timeframe to view.
- Zoom and adjust a snapshot view in the same way you do in the single timeframe view.
To remove the snapshot, right-click over the snapshot and click Cancel Snapshot .
Right clicking and selecting Zoom Selection will cancel the snapshot, returning to a Single view. When in Snapshot view, use Take Shapshot to apply a change to the timeframe, instead of Zoom Selection.