Edit Tags
Quick Summary
You can create and delete network object tags, from the Network Table or Graph views or when viewing Node Details.
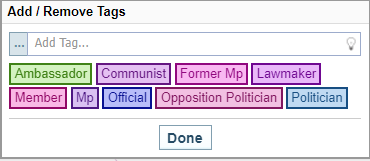
Clicking on a Tag opens the Add/Remove Tag dialog.
-
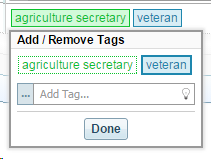
To add a Tag, type a Tag name in the field and press ENTER.
-
To remove a Tag, click on the tag. The tag colour background is removed.
-
Select Done to close the dialog and save the changes.
Network Table
Tags on network objects are visible to the user on the network Entity Table as labels.
To edit the tags, click in the field. The Add/Remove Tag dialog is displayed.

Node Details
Tags are displayed as labels in the Node Details pane.
To edit the tags, click in the field. The Add/Remove Tag dialog is displayed.

Network Table
Tags on network objects are visible to the user in the Network Graph as circles or segments around nodes.
Hovering the cursor over the circle will display the name of the Tag A configuration used for automatically adding document tags to Sintelix documents based on a pre-trained model.
To edit the tags, click on a tag coloured segment.
Alternatively, right click on the node to open the node menu and select Add / Remove tags.

Result: The Add/Remove Tags dialog is displayed.
Add a Tag
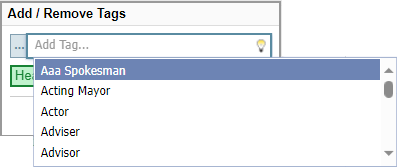
There are three ways to add a tag, you can:
-
Type a tag into the Add Tag... field and press ENTER.
-
Select the lightbulb icon to select from a list of suggestions.
 x
x -
Select the
 Pick other Tag button to select from other tags in the Network.
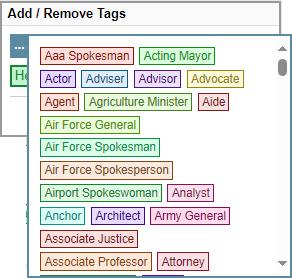 x
x
Remove a Tag
To remove a tag:
-
Click the tag name to toggle it off.
-
Select Done and the toggled-off tag is removed.
