Rules: Fields and Options
Background
When you create a new rule or select a rule from the Rules tab, the Rule dialog is displayed.
There are a number of settings you can use to manage how selected elements are harvested.
For information on when, why and how to access the Rules dialog, see Evaluate and Modify the Rule Set and Rules Tab: Modify Rules.
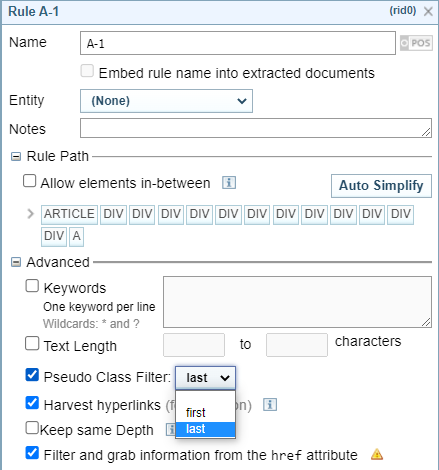
Rule Dialog
The Rules dialog is shown below:

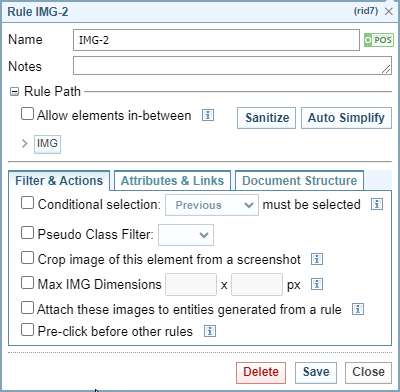
The Rules dialog for the IMG (image) tag has options specific to images:
The Rules dialog for the A (link) tag has options specific to links:

The Rule Header and Rule Path sections are always visible. Advanced features are organised on three tabs: Filter & Actions, Attributes & Links and Document Structure.
Rule Header

|
Field or option |
Description |
|---|---|
|
Name |
Rules are named automatically, based on the element they select (that is, the tag, not the class). Modify the name if required. Rule names do not need to be unique. For example, to differentiate between similar rules you can add a further description, e.g. H2-article, H2-related-links. |
|
|
By default, rules are positive. To change a rule, click the POS toggle If a rule is:
Negative rules override positive rules. For example, if a rule selects the text in a table of contents but another rule excludes the entire table of contents, the text in the table of contents will not be harvested. |
|
Embed rule name into extracted documents |
If you want to create a native annotation (that is, a custom tag), tick this box. To process the output from the rule you will need to create an entity extraction script. For information see Entity Extraction Scripts configuration. |
|
Entity |
If you want to apply a Sintelix tag to the text harvested by the rule, select the tag from the dropdown list. To create a new tag select Other then enter the name of the tag. For example, you have created a rule to harvest the 'Poster' element on a forum, which will gather the identifiers of people who have posted comments. Identifiers on the forum are typically one word, such as 'BlueFin' or 'Fullarton 125', so Sintelix won’t recognise them as names. By creating a custom tag called 'Poster' you will be able to identify this information in Sintelix later. |
|
Notes |
Enter any notes relevant to the rule. For more complex rules, it can be helpful to note the purpose, any key decisions made when preparing the rule and any dependencies to other rules. |
Rule Path
The Rule Path is the core of the rule. The Rule Path instructs Harvester how to identify content based on the html element tags and associated class values.
The rule will only be executed when the exact tags and classes in the path are detected.
Having too many tags or too many classes in the rule path may be too restrictive.
However, not enough tags or limited classes in the rule path may be too broad.
By experimentation and testing using the Gold Standard document and the Full Page document comparison, you can determine which combination is most effective across the collection.
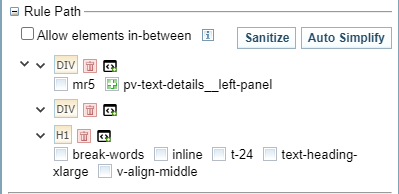
The rule path is displayed in a collapsed view, for example:
![]()
You can click on the > symbol to expand the elements.
Allow elements in between
When the Allow elements in between checkbox is selected, the rule is executed when the tags (tags only, not classes) are matched, regardless of other tags that may be between them.
Example 1:
If the rule path is and a document path is
- will be matched whether the check box is ticked or not
- will only be matched if the check box is ticked
Example 2:
When you want to Harvest hyperlinks, the last tag must an Anchor tag . If the Anchor tag has other elements in between the opening and closing tags, these need to be ignored.
If the:
-
path rule is , and the
-
document link path is then
-
if the check box is checked, the rule will be actioned
-
if the check box is not checked, the rule will be ignored.
Santize
Select to remove all classes from all tags in the rule path.
Auto Simplify
To automatically remove extraneous tags and classes from the path, to the point where the effect of the rule on the gold standard is not changed, click .
You can automatically simplify every rule in the set by clicking button on the Rules tab.
Simplified rules are more generic and run faster than rules with more complex paths.
However, Auto Simplify may make the rule too generic.
If Auto Simplify removes too many elements, you can either:
-
delete the rule and recreate the rule and then manually deleting excess tags or ignoring unnecessary classes to determine the most effective combination.
-
manually add back in elements and classes (see Modifying the Rule Path Tags and Modifying Classes below).
Modifying the Rule Path Tags
Expand the path
To expand the path and view the classes associated with each tag:
-
select the arrow
 to expand the path
 -
select the arrow
next to each tag to reveal the associated class names.
Add a tag
To add a tag below the current tag, select the Add HTML button  .
.
Result: A tag is inserted below the current tag. You can double click on the tag name to change it to a different type of tag.
Edit/Change a tag
You can change the tag to a different type by double clicking on the tag and editing the tag type. For example, change a tag to a tag.
Delete a tag
To delete a tag just click the trash can icon  beside it.
Modifying the Classes
Classes
When you expand a tag, you can see the classes associated with that tag.
Classes are ‘ANDed’ together and can be ![]() positive,
positive, ![]() negative or
negative or ![]() neutral.
neutral.
When a rule is created, all the classes are positive by default. For this element tag of the rule to be executed, all of the classes marked as positive must be in the class list of the tag.
Select the box next a name to change the rule:
-
 tags must contain the class
 -
 tags must not contain the class
 -
 ignore the class - it does not matter if the tag contains the class name or not
Remove all classes from the tags
Select to remove all classes from all tags in the rule path.
Add a class to a tag
To find more classes for a tag in the current path and current document, click the magnifying glass icon ![]() .
.
A dropdown list is displayed. You can either select an existing class or create a custom class.
The classes in the dropdown list are from the tag you used to create the rule, and only classes from the current document are listed.
Add an existing class to a tag
-
select class you want to add from the dropdown list
-
select
 to add the class (or
  to cancel).
Add a custom class to a tag
-
select the magnifying glass icon

-
select Create Custom Class option
 at the bottom of the dropdown list.
 -
enter a custom class name in the field displayed

-
select
to add the class (or to cancel).
Filters and Actions
This section describes the options available on the Filters and Actions tab.
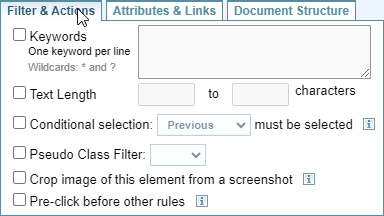
Keywords
If you want a rule to be executed only when text matches one or more keywords, tick the Keywords box then enter the keyword or keywords, one per line, in the field.
To match text within a word, use a wildcard character either side.
An asterisk (*) represents multiple characters.
A question mark (?) represents a single character.
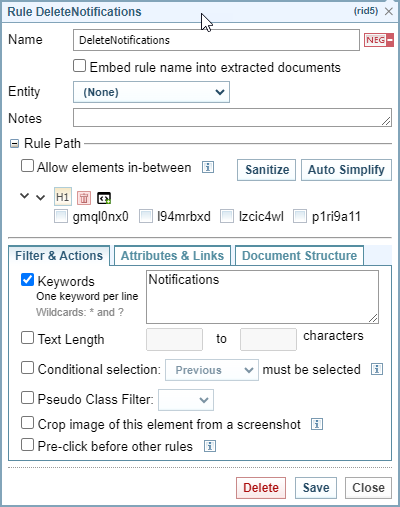
Keywords Example
This example looks for the Keyword "Notifications" in a H1 (Heading 1) tag. This is a negative rule, which means if the H1 tag includes the text "Notifications" it is not harvested.
Text Length
If you want this rule to be executed only when the text length is within a specific range, tick the Text Length box then enter the range, in characters.
For example, you have created a rule set to harvest articles from random news sites. You want a rule to harvest author’s names so you enter a keyword of ‘By’ and a text length range of 4 to 300.
Conditional selection
You can set conditions limiting when the rule is applied.
For example, you can choose to only apply this rule if the previous H1 is selected.
Once you have selected the Conditional selection checkbox, you can choose to only execute this rule when:
- the previous tag has also been selected, by selecting ‘Previous’ from the dropdown list
-
a previous type of tag above has also been selected, by selecting the tag from the dropdown list

-
a previous Rule has been applied, by selecting "Rule above" from the dropdown list and then selecting the rule in the Select Rule above dropdown


Pseudo Class Filter
You can apply a filter to a ruleset that allows Sintelix to select an element of a group based on its position.
For example, this is quite useful for selecting the last and first links of a list to “enable infinite scrolling” by harvesting the next and previous pages links.
You can choose to select the:
-
first: only selects the first element of a group
-
last : only selects the last element of a group
Ignore text changes when removing duplicates (conditional)
This option only appears when the Duplicate URLs dropdown is set to Rule Based Filter under the Rule Set Configuration tab.
Selecting this option tells Sintelix to ignore changes in the text content of a URL when presented with a web page it has already harvested.
For example, this can be useful for ignoring commonly changing content, such as timestamps.

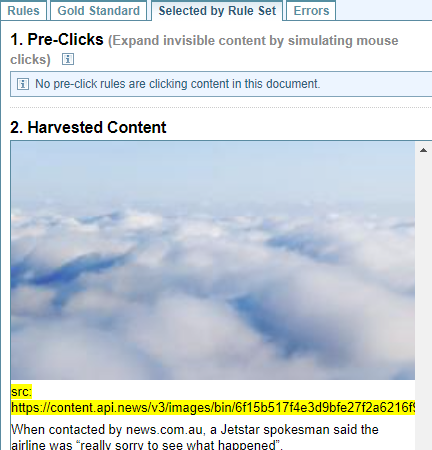
Crop image of this element from a screen shot
Selecting this option includes a screenshot of the content targeted by the rule along with the textual content.
This an advanced feature that is normally used as a last resort when content cannot be grabbed with a different technique. It will find the bounds of the element on the page, scroll to it, take a screenshot of the full page, crop to the bounds and then save the image in the document. This process is slow yet very robust at grabbing the content of iframes or other difficult content.
The Selected by rule set tab lists the rules in which the pre-click parameter has been selected, and shows the effect of these rules.
Pre-click before other rules
If you want Sintelix Harvester to expand hidden content by simulating mouse clicks before harvesting, select the Pre-click before other rules checkbox.
For example, there is a 'Show more' button on a web page. In the rule set that selects this button the Pre-click before other rules option has been selected. The button is automatically clicked before harvesting begins so that the additional content is shown and can be harvested.
Max IMG Dimensions
This option is only displayed when the last tag in the Rule Path is an tag.
You can set an maximum size of an IMG.

The filter can be used in combination with NEG rules to get rid of IMGs of a certain size (like 1x1 placeholders).
Attach these images to entities generated from a rule
Images (from IMG tags only) can be grabbed and attached to entities created from other rules before or after. This lets you create a rule that associates a profile picture with a person to be viewed in a Sintelix network.
Attributes and Links
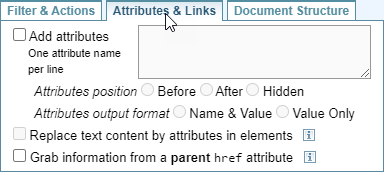
Add attributes
You can extract HTML attributes from the selected elements.
Once the option is selected, you can choose to:
-
display the attributes before or after the selected element or hide the attributes.
-
display the attribute "Name & Value" or just the "Value"
-
replace the selected element by its attribute list.
Quick Example Add Attributes

You can view the results in the Selected by Rule Set tab.
Extract IMGs from attributes when possible
This option is only displayed when the Add attributes option is selected.
This option allows you to extract images within the attributes of elements, for example, within ,<video> tags.
When selected, Harvester will recognise when an attribute as a valid image URL and attempt to extract the image. If the image cannot be rendered, the attributes will be displayed instead.
The extracted image will be visible in the extracted document, but not on the preview.
Replace text content by attributes in elements
To replace the content of the element with a list of the element attributes, select the Replace text content by attributes in elements checkbox.
Harvest hyperlinks
To harvest content linked to by a hypertext link (A tag), select the Harvest hyperlinks checkbox.
Sintelix will follow the link and harvest the resulting web page. Sintelix will continue harvesting web pages from following links, for the number of levels specified in the Rule Set Configuration Settings, Max Harvest Depth field.
Keep Depth
The Keep Same Depth checkbox is only displayed once you have selected the Harvest hyperlinks options.
To prevent ongoing harvesting once the hypertext link has been followed, select the Keep Same Depth . This can be useful when selecting a Next Page button , or something similar.
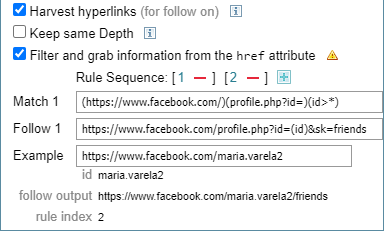
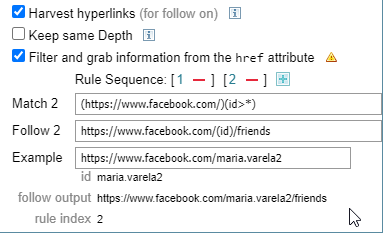
Grab information from a parent href attribute
Takes the href attribute of a parent A tag and extract information from it, for example a user ID and then use it to follow a URL.
You can use a sequence of matching criteria. You can also enter an example to view the result.
Example 1
Below is an example for finding and following facebook friend profiles.
|
Rule Sequence 1 |

|
||||||
| Match1 | (https://www.facebook.com/)(profile.php?id=)(id>*) | ||||||
| Follow 1 | https://www.facebook.com/profile.php?id=(id)&sk=friends | ||||||
|
Rule Sequence 2 |

|
||||||
| Match 2 | (https://www.facebook.com/)(id>*) | ||||||
| Follow 2 | https://www.facebook.com/(id)/friends | ||||||
|
Example |
https://www.facebook.com/maria.varela2 |
||||||
| Example output |
|
Example 2
Below is an example for finding and following facebook mobile friend profiles.
|
Rule Sequence 1 |
|
||||||
| Match1 | (https://mbasic.facebook.com/)(profile.php?id=)(id>*)(?eav=*)(&fref=fr_tab)(*) | ||||||
| Follow 1 | https://mbasic.facebook.com/profile.php?id=(id)&sk=friends | ||||||
|
Rule Sequence 2 |
|
||||||
| Match 2 | (https://mbasic.facebook.com/)(id>*)(?eav=*)(?fref=fr_tab)(*) | ||||||
| Follow 2 | https://mbasic.facebook.com/(id)/friends | ||||||
|
Example |
https://mbasic.facebook.com/eugenia.podesta?eav=AfYwQE79lwQgfiAltr207NCG-mMVwEaR_GECjposmK5i0dBf0ACZxpqb2fVp1HP69t8&fref=fr_tab&refid=17&paipv=0 |
||||||
| Example output |
|
Dialog example:
Example of Match 1:
Example of Match 2:
To add a new rule sequence, click on the ![]() Add button.
Add button.
The Rules are identified in brackets, for example: .
To navigate to the sequence, click on the number.
To remove a sequence, click on the red minus symbol.
Document Structure
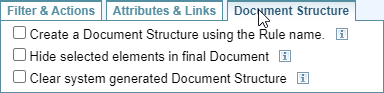
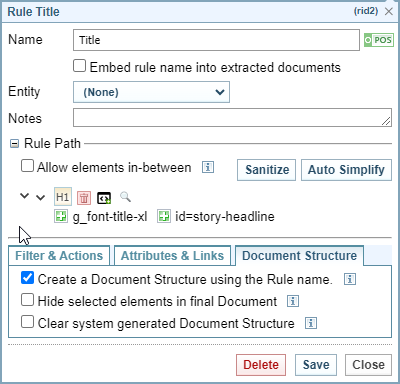
Create a Document Structure using the Rule name
Allows you to add structure headings to the document, using the rule title.
When this checkbox is selected, all elements selected by the rule will be wrapped under the rule title. These structure headings can be displayed or hidden when viewing the document using the Find Structure option.
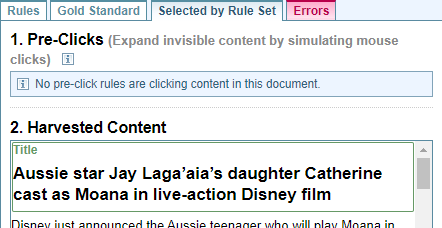
The structure headings will not be visible in the Gold Standard tab, but will be visible under the Selected by Rule Set tab.
For example, the above rule applied to the H1 element, which is shown with the Rule title "Title" and the green box shows the elements wrapped by the structure heading.
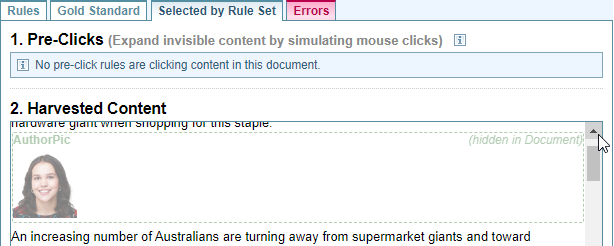
Hide selected elements in final Document
When selected, the elements selected by this rule will be hidden in the final document. They will be able to be displayed when viewing the document using the Find Structure option.
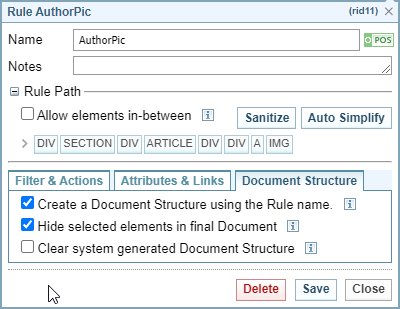
The above rule gives the selected element the structure heading of the rule and hides the selected element in the Document.
Clear system generated Document Structure
This option removes any system generated nesting from all children of the selected elements.
This opeion removes System generated Document Structure from the Document. This can be useful when a document has multi-level nested sections that clutter the view.
Below is a list of system elements are removed when this option is selected:
-
ARTICLE
-
DETAILS
-
DIALOG
-
FIGCAPTION
-
FIGURE
-
HEADER
-
FOOTER
-
MAIN
-
SECTION
-
SUMMARY
-
TABLE
-
TR
-
TH
-
TD