Assign documents to Taxonomies
A document is assigned to a taxonomy node if the document has document tags that satisfy its path.
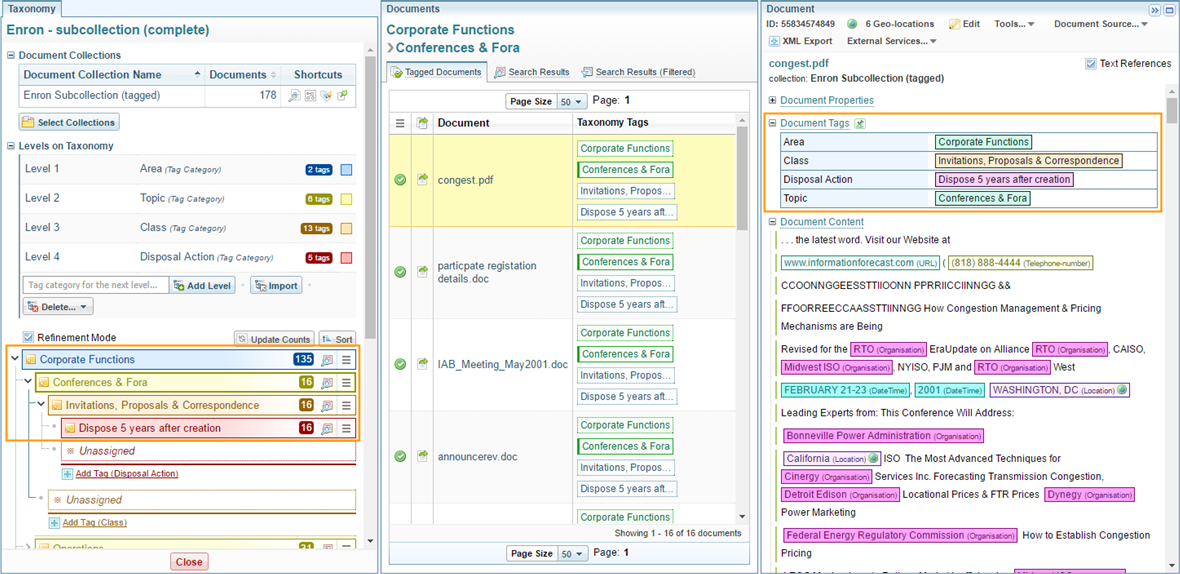
In this example, documents assigned to the Conferences & Fora taxonomy node must have the following two document tags:
- Corporate Functions of tag category Area
- Conferences & Fora of tag category Topic
The assigned document may have more lower levels tags if it is also assigned to its child nodes.
This image shows a document assigned to a node on a taxonomy with 4 levels. Note how the highlighted regions correspond.
Method of assigning documents
In a freshly created taxonomy, all documents are initially unassigned, and need to be transferred from the Unassigned node to the target taxonomy node. This can be done in a company of ways, by:
- dragging and dropping them onto the target taxonomy node, or
- performing a document search and accepting the search results.
Assign documents by dragging and dropping
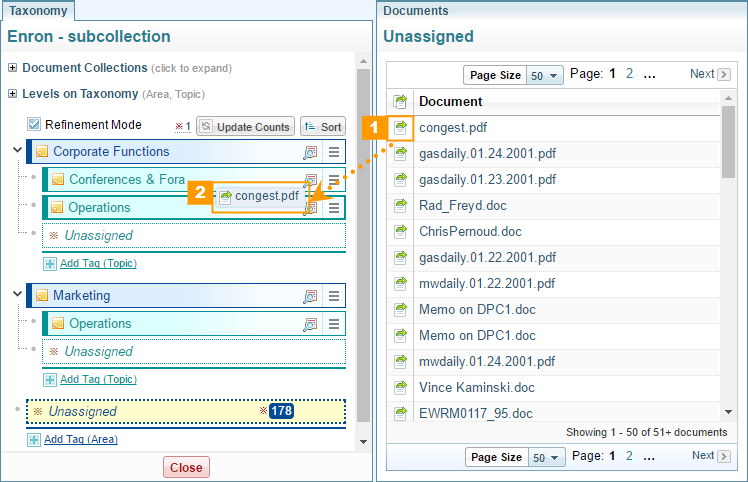
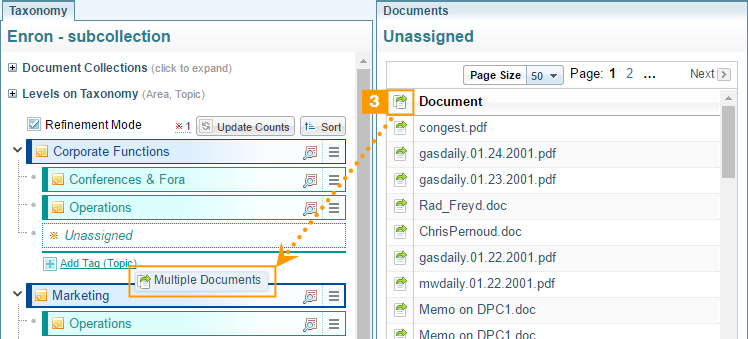
Click and hold to drag unassigned documents from the unassigned list shown at 1 on Figure 1, onto the target taxonomy node 2 on Figure 1. This creates the taxonomy tags for the node path.
Adding a description
To add a note to taxonomy tags, click the folder. When the Edit Description dialog box appears, enter desired text, then click Save.
To edit the note, click edit  in the tag line. Click Save when editing is completed.
To delete the note, edit and delete the text and click Save.
Export taxonomy to a Dictionary
Only a single line of the description text is saved for export.
To define extra columns, use the comma (,) to separate column values, starting at the back.
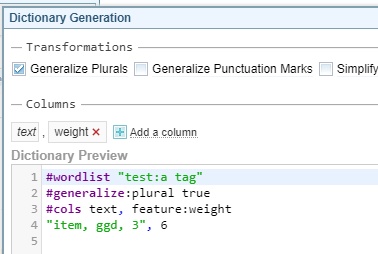
item, ggd, 3, 6 without quotes is in the Note description, and there are 2 columns only, only the last column is treated as a separator. The resulting text value is "item, ggd, 3" and 6If column data is missing it will be ignored and filled with empty values.
Assigning documents by search
The Search function provides a way to quickly select and assign multiple documents.
Use the highlighted Search icon to open the search panel.
The query settings
The search configuration panel will appear as a new tab panel, the original taxonomy tab will be temporarily disabled to avoid confusion.
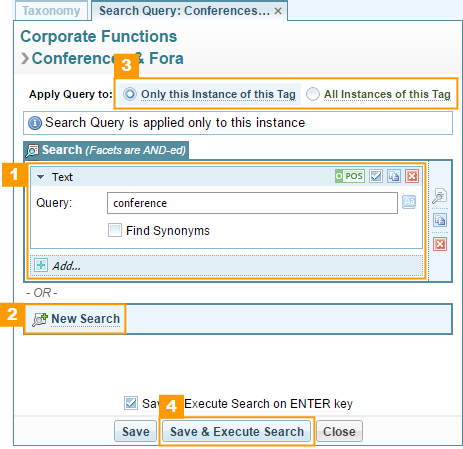
You can specify multiple sets of document query in the search configuration panel. A set of document query is highlighted as region 1 in Figure 4. The query language is the same as that in the search page (see Search Query Pane). Unlike in the search page, you can add another set of Search queries using the New Search button ( 2 in Figure 4). The results from multiple sets of queries are OR-ed together, meaning a document only needs to satisfy any set of query to be selected.
If your taxonomy tag is used multiple times in different branches on the same level, you can switch to apply the query to All Instances of this Tag ( 3 in Figure 4).
Click 4 Save & Execute Search to run the document query. The query will be remembered for the taxonomy node in question.
The search results
The search results for a taxonomy node are displayed in the Search Results tab panel of the Documents pane ( 4 in Figure 4).
By default, the search will capture all documents satisfying the query. To switch to filter out documents outside the current branch (that is, not having the required parent taxonomy tags), click 5 and switch to Search Results (Filtered).
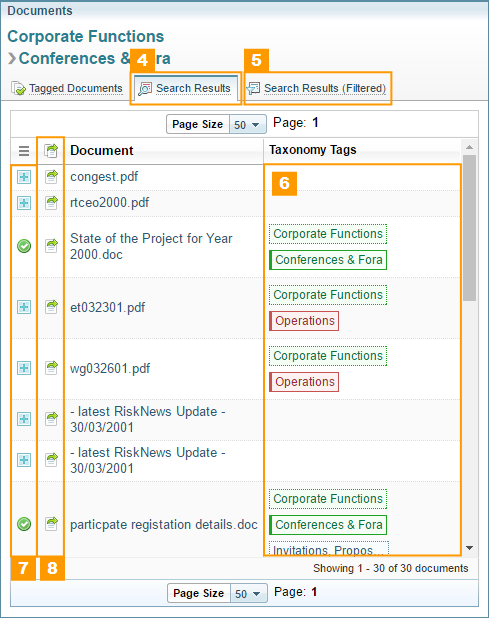
From the search results document list, you can click on the document title to view the content of the document.
The taxonomy tags column
Existing document tags related to the taxonomy are displayed in the Taxonomy Tags column 6. Different colours are used to indicate the status of the tags in respect to the current taxonomy tag path.
Green if it is part of the current node path.
Red if it is outside the current node path.
Blue if it is a child tag on the current node path.
The current level tag is drawn with a thicker left border: Current Green/Current Red.
To tag and untag documents
Accept and assign the document to the current taxonomy tag by clicking the  icon, shown in Figure 6. Alternatively, drag and drop documents using the controls in column 8.
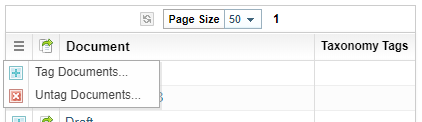
To tag and assign multiple documents at the same time, click on the Action menu icon  .
.
Tag documents: accept and assign documents on the current page or all pages.
An option and confirm dialog is displayed.
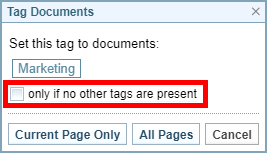
Check the highlighted box to skip documents that are already assigned to a different node path (having ‘red’ tags’).
Choose between Current Page Only and All Pages to apply the changes.
Un-tag documents on this page : remove and unassign documents that are already assigned to the current tag.
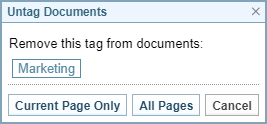
Choose between Current Page Only and All Pages to apply the changes.
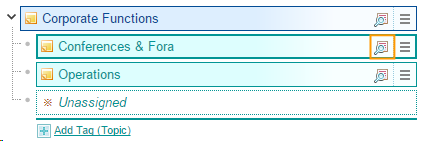
Multiple documents can be assigned by dragging the icon at the table column header ( 3 in Figure 2). Notice that the floating box shows Multiple Documents.

Drag and drop allows fine tuning of document assignment to the taxonomy, but it not the most efficient way. The Search function explained next is more faster and more efficient.