Edit Documents
Editing document views
It is possible to manually markup a document, or manually correct mistakes made by automated named entity extraction.
Manually created document tags will get deleted when you reprocess the collection, unless you set them as exceptions before reprocessing. See Preserve Markups and Document Tags while reprocessing, for more information.
You can configure Document Processing to include Machine Learning.
Machine learning will "learn" from edits made to documents, stored as dictionaries and entity extraction scripts, so they can be retained during reprocessing and applied to future documents.
If Machine Learning is enabled, you will see a message in the top right of the edit document pane -  .
.
Access the Document Editor
To manually markup a document, or correct mistakes, click the edit icon  from any of the following locations::
- select Collections > Documents >
- Document Pane layout> (on the Document Toolbar).
Quick Summary
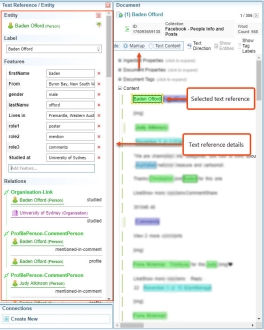
On the edit window that is displayed, you can do any of the following:
- View a Text Reference - Hover over the text reference Text that has been marked up (that is, highlighted with a coloured label) in a document. to view its type. Click a Text Reference, to view its details in the Text Reference/Entity pane.
- Edit a Text reference and its connections - Select Markup, select a Text Reference, and in the Text Reference/Entity pane that displays the details, you can edit the Text Reference and its connections.
- Add a new text reference - Select an
ontology A Sintelix Configuration that defines the classes that make up the entities, text references and link types in a project.
type from the Ontology pane, and in the Document pane select the text - hold the CTRL key and drag to select a portion of the text, as shown in the following example:
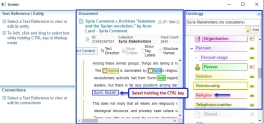
The following example illustrates the process.

- Create Connections - Click Create New from the Text Reference/Entity > Connections section. Select a connection type from the dropdown, fill the required details and click Create
- Edit the text - Select Text Content as shown in the following example. This opens the Document in edit mode. To edit the Content, click the selected area.


Document Model
Sintelix document model has two layers of data:
- text references, and
- entities.
Text references are marked up spans of text, easily visible on document view. They're not copied to the Network by default.
Entities are groups of text references within a document. They correspond to all the mentions of the same object (distinct Person, Organisation, etc) and group all the information about that object.
Entities and their features are copied to the network by default.

Document editing is performed mostly by adding, removing, and, changing the type of text references.
However, because it is entity, and not text references that form a network, the end goal of document editing is to produce correct entity information.
Not all text references need to be grouped into an entity. The Document Processing Configuration output table contains a column Document Entity Resolution which decides for each type, whether that type forms and entity.
Document editing enforces that table by ensuring that all text references that need to form an entity do so.
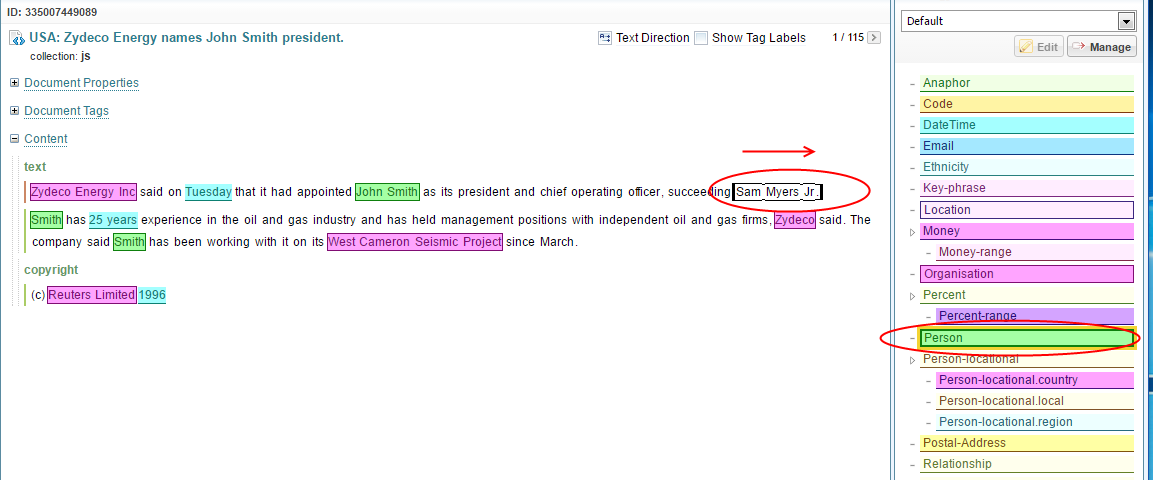
Creating a new text reference
To add a new text reference to a document:
- make sure no entity is currently selected
- select the desired text reference type from the ontology view on the right
- hold the control button on your keyboard
- using your mouse, click and hold on the first word you want to markup
- holding the left mouse button, move to the last word to markup
- release the left mouse button.

Text reference will be created. If the current Document Processing Configuration declares the selected type as Document Entity Resolution, a new entity for that text reference will be created as well.
Deleting an existing text reference
To delete a text reference, right-click on it, then select Delete ".
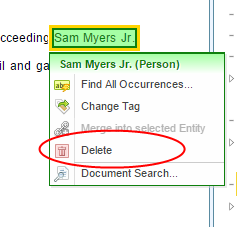
- If this text reference does not belong to an entity, it is deleted immediately.
- If this text reference belongs to an entity, but is the only text reference of that entity, it is deleted immediately, and the corresponding entity is also deleted.
- If this text reference belongs to an entity, but the entity has more text references, a pop-up gives an option to delete all of the entity's text references in bulk.
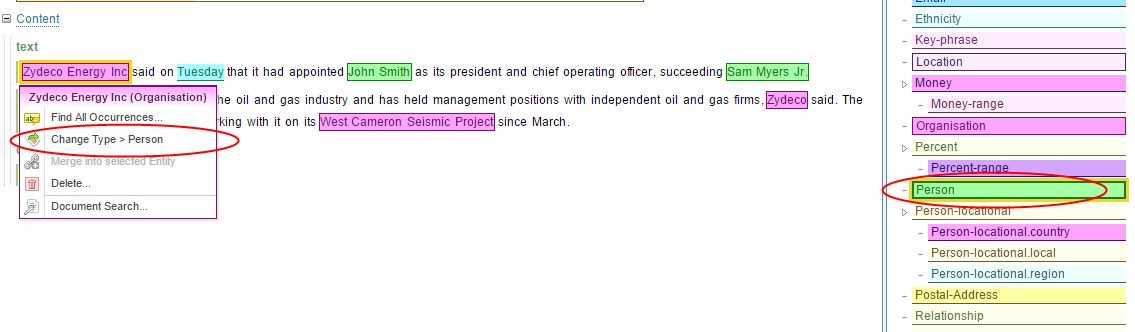
Changing the type of a text reference
To change the type of a text reference:
- Select the desired text reference type from the ontology view on the right.
- Right-click on the text reference to change.
- From the menu, select Change Type.
Similar to deletion, if the text reference belongs to an entity that has other text references, a pop-up appears. The pop-up gives an option to change the type of all the text references of the entity.
Merging entities
All text references that mention the same object should be grouped into one entity. If they're not then:
- Select a text reference belonging to an entity you want to merge to. Its features and label remain in the merged entity.
- Right-click on a text reference belonging to the entity you want to merge.
- Select Merge into selected entity.
Make sure the features and label of the merged entity are correct. See Editing features below,
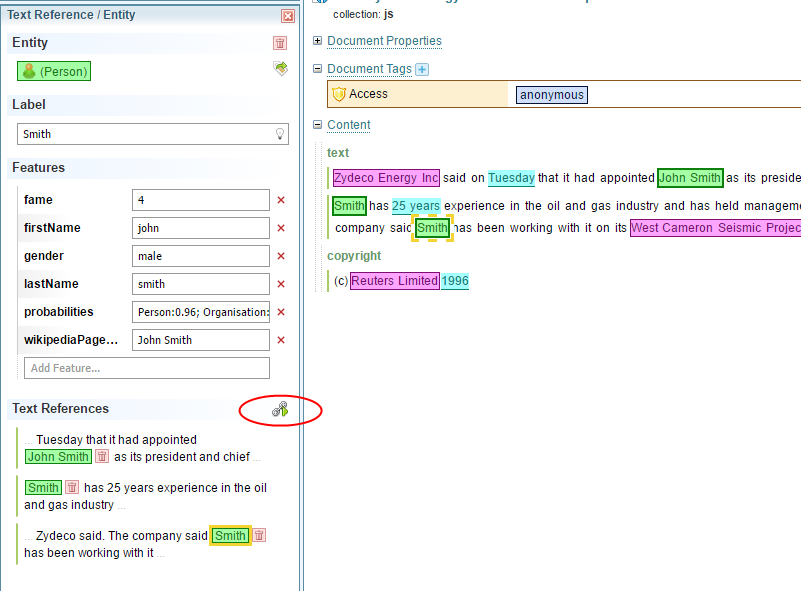
Splitting entities
To split an entity into two entities:
- Select a text reference belonging to en entity you want to split.
- On the left-hand side select Move text references to another entity.
- From the pop-up select Create New Entity.
- On the left-hand side, for each text reference that needs to be moved, select Move.
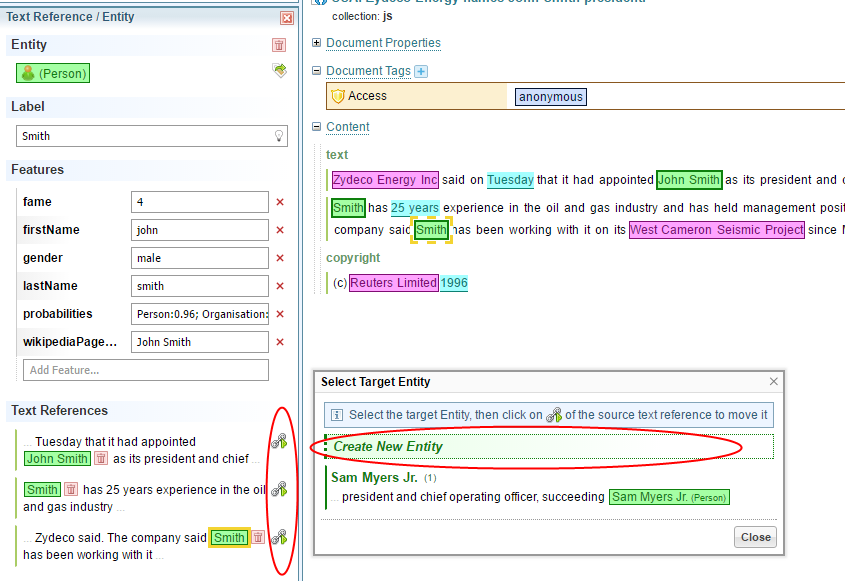
Make sure the features and label of both entities are correct (see Editing features below).
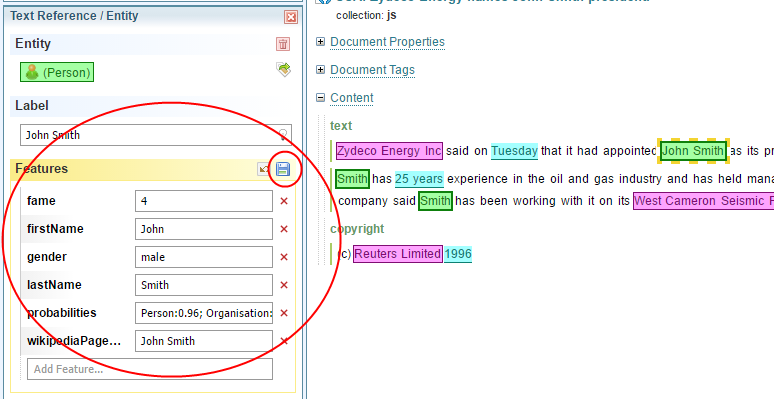
Editing features
To edit features of a text reference:
-
Select a text reference. The features and entity label are available on the left hand side.
-
Edit as required, then select Save.

Creating a text reference and immediately adding it to an existing entity
To create a text reference and immediately add it to an existing entity:
- Select a text reference belonging to an entity you want to merge to.
- Hold the control button on your keyboard.
- Use left mouse button to markup new text reference, as described in the Creating a new text reference section.
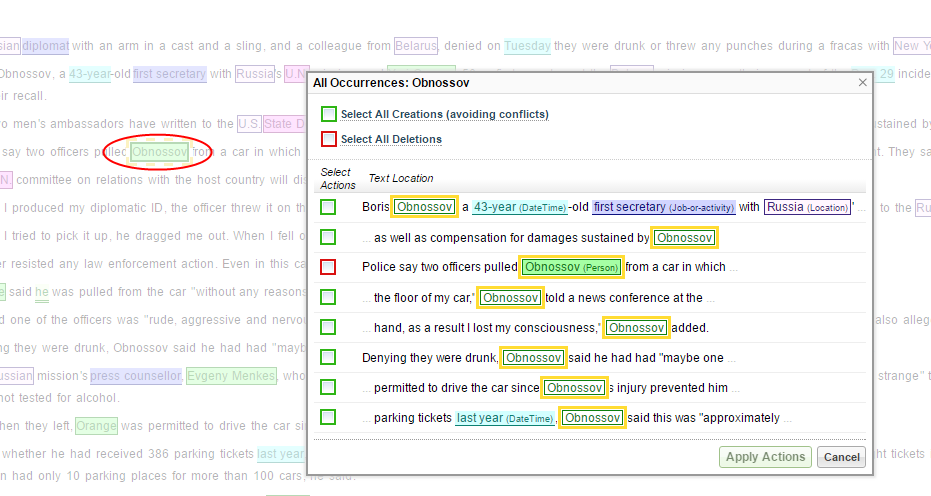
Creating multiple text references with the same text
To markup all instances of identical text:
- Create an example text reference.
- Right-click on that text reference.
- Select Edit all Occurrences.
- In the window that opens, select all instances of the same text you want to markup.
Deleting connections
Connections are a layer of information that links entities together, and eventually produces network links.
When a text reference is involved in some connection, a number appears showing how many connections use this text reference.
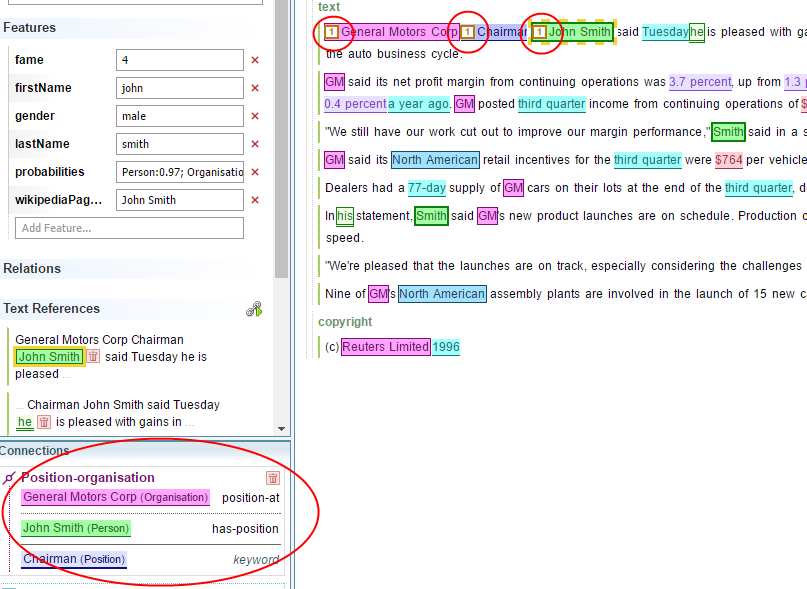
To delete a connection:
Click on any text reference and select Delete from the Connections panel.
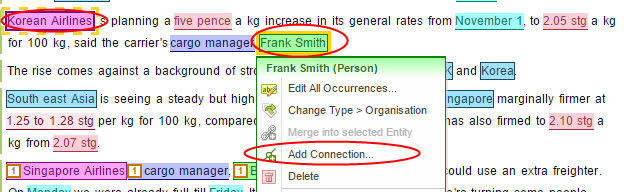
Creating new connections
To create a new connection:
- Identify the text references that should be connected.
- Select one member of the connection.
- Right-click on another member of the connection.
- Select Add Connection.
-
In the dialog box for Create Connection, make sure the connection type is correct, and the two text references occupy correct slots. If there is a third slot (such as keyword), and there is a correct text reference for it, select the empty slot and then select the text reference to fill it.
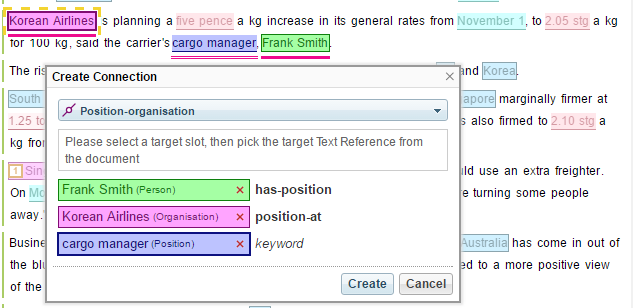
- Select Create.
The Ontology link schema has a list of valid link types. To create a new link on the Ontology, then modify it.
Adding Document Tags
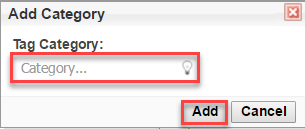
To add a new a Document tag category:
-
Select the + button next to Document Tags.

-
Enter the name of the new category in the Tag Category field, then select Add :
-
To add a new tag from an existing category enter the tag name in the Add Tag... field, then select Add.

Deleting Document Tags
To delete an existing tag:
Select Delete ![]() next to the tag you want to delete.
next to the tag you want to delete.

If a Document Tag category has no tags, the category is automatically removed by the system.
Merge or split text blocks
In some cases you may want to split or merge text blocks. For example, when editing an audio transcript you may want to assign parts of a transcript to specific speakers, you would need to merge or split the text.
These text block changes will persist even if the document is reprocessed, which means you can now fix up difficult documents before applying dictionaries and EES.
To merge the text blocks:
- Click the text block to be merged.
- Select Merge Texts
 .
. - At the Merge Text Blocks dialog, check the box next to the lines of text to be merged.To select multiple consecutive lines, check the lowest line, and every line in between will be automatically checked.
-
All the selected text blocks in the row are added in the Merge Text Blocks dialog, and the number of text blocks selected will display.
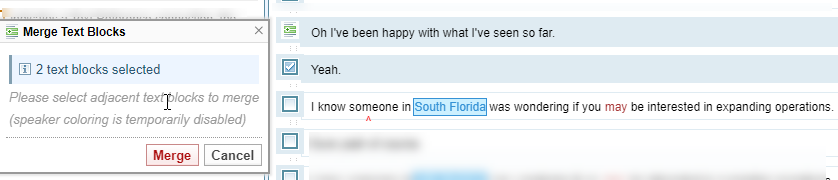
Text can be merged only between consecutive text blocks on the same level.
-
Click Merge.

To split a text block
- Double click on the text or drag the mouse to select a part of the text to split and click Edit text.
- In the Text Editor, select the split point.
- When the Split Text Block appears, to show the split point, click Split to confirm your selection point, or Cancel to redo.
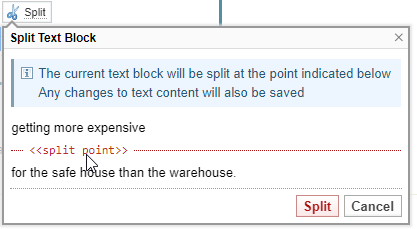

All text references spanning the split points are removed.