Edit Table View Configuration
Edit Table View Configuration dialog
You can create, modify, format and sort table columns.

|
|
Click and drag to change the order of the fields. |
|
|
Show or hide the field. Selected includes this field, unselected excludes this field. |

|
Select the data/information to go into the field. Click the lightbulb icon For more advanced expressions, refer to the Field Path Expressions help at the bottom of the dialog. Click on the expand icon The Field Path Notation section lists down some syntaxes which you can use. See Field Path Notation and Field Path Notation Syntax for more information. |

|
Only Visible when enabled for apps. Allows you to add calculations to fields. |
|
|
Allows you to apply Styles and Formatting to the field. |

|
Give the field a name. |
|
|
Select and choose a colour for the column. |
|
|
Select the preferred sorting order when selected: ascending or descending. |
|
|
Set the column width.
|
|
|
Delete the column. |

|
Select the Add New Column button to add a new field. |

|
Switch between column widths being fixed or variable. |

|
Switch between row heights being one line or variable. |

|
Set the default Sort by column setting. |
 to view detailed instructions.
Apply Styles and Formatting
Using the Styles & Formatting feature you can makes these changes to the content in your table:
- Apply styles to your table cells - font size, style and colour.
- Add/Remove data - add or edit text/symbols, remove or replace existing text/symbols to the cells.
- Change number format - add fractions or separators.
- Apply conditional formatting - add styles and formatting as per the applied conditions.
To apply Styles and Formatting:
-
Select the formatting icon
 displayed in the Edit Configuration dialog. The Style & Formatting dialog displays.

-
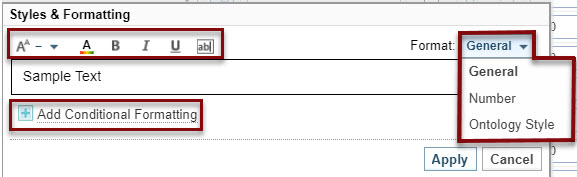
Select the Format drop-down, and select one of the following sections to add values.
If you want, you can add Conditional Formatting to General and Number styles. See Conditional Formatting.

General
Select General from the Format drop-down, then do any of the following:
- To increase decrease or keep the font size normal, select the size icon
 , then select the options.
 - To change the font colour, select the text colour icon
 , then select a colour.
 - To apply bold, italics and underline, select the icons specific to these styles -
 .
. -
To replace or add value within the text field, select the text icon
 and do the following:
- To replace the available value, add the value within the <>.
- To add value after the available value, enter values after or before the <>.
Ontology style
- Select Ontology Style from the Format drop-down.
-
Select the following options as per your preference. The values are displayed as the colour set in the Ontology:
- Look up value in Ontology as a Node Type or Link Type
- Show Icon set by Ontology
- Show Text
Applying conditional formatting to an Ontology Style, will override the Ontology style.
Number
-
Select Number from the Format dropdown.
-
Fill the following fields with your preferred options:
-
Min Fraction Digits - Display the minimum number of digits after the decimal separator. For example, setting the minimum fraction digits to 3 displays the value of 1 as 1.000.
-
Max Fraction Digits - Display the maximum number of digits after the decimal separator and rounds the value when truncated. For example, setting the maximum fraction digits to 2 displays the value of 1 as 1.6666 as 1.67.
-
Large Value Threshold - Display the abbreviation of a unit. For example, setting up the unit as M (Million), displays the value of 1230000 as 1.23 M.
-
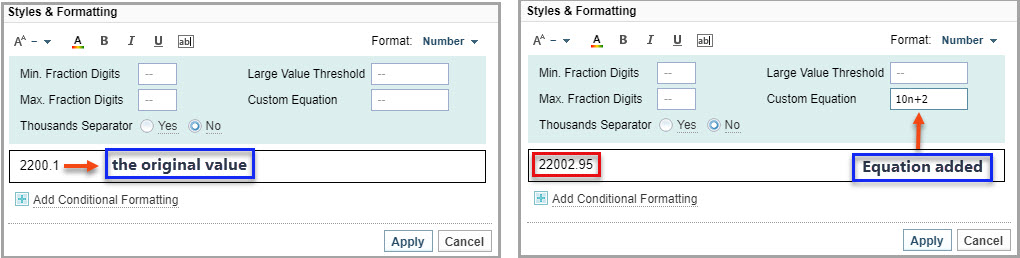
Custom Equation - Display the value using a common math expression such as 2n, n/10. The n in this case refers to the original value displayed in the field, and the equation is applied onto the original value, as shown in the following example:
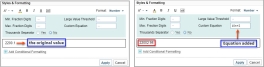
-
Thousands Separator - Display a thousand separator, if yes is selected.
-
- To increase decrease or keep the font size normal, select the size icon
-
Select Apply.
Conditional Formatting
The following are some common usages of conditional formatting:
-
colour coding based on numeric values.
-
Un-bold values that are empty or zero.
-
Apply bold styles to values that are more than the set minimum value.
If you want to apply conditions to the formatting that you have set up for General or/and Number, do the following:
-
Select Add Conditional Formatting.
-
Select a condition from When value is equal to dropdown.
You can add a condition into the same condition if you want to. Select add another condition from the dropdown.
-
Apply the styles as per your preference. See General section in this topic for more information.
-
Select Apply.
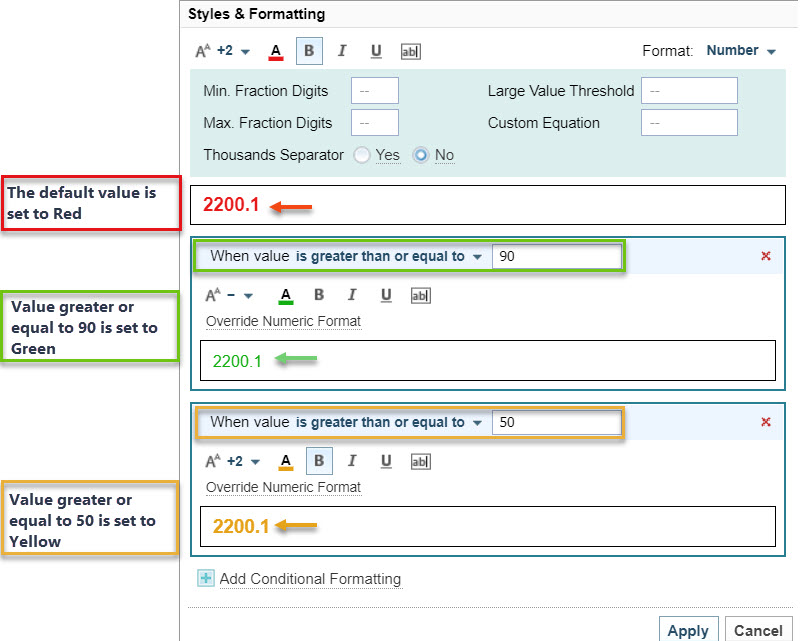
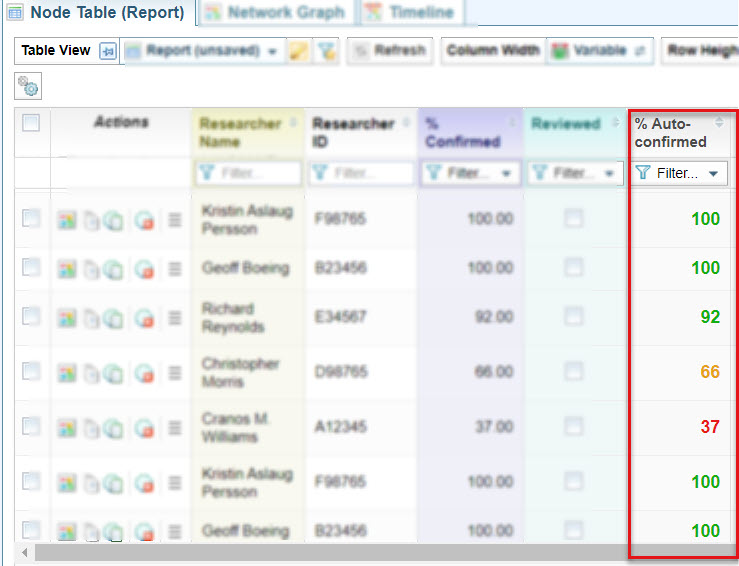
The following example screenshots illustrate the styles applied as per the set conditions:
| Styles Applied | Results Displayed |
|
|
-
Select the colour field and select a colour for the column from the Edit Column colour dialog.
-
Select a column and drag it to your desired position, or select the order from the Default Sorted Column list.
-
Enter a number in the Width field. This defines the width of the field in pixels. Alternatively you can click the Adjust Column Width (in Pixels) icon
 and drag the slider.