Configure and Secure Libraries
Libraries
Libraries are used to Add Documents to a Collection.
Libraries appear as tabs on the Add Documents panel, under Collections.
You can modify the libraries.xml file to:
-
add additional libraries, and
-
add security to libraries.
Types of Libraries
There are different types of libraries:
-
File System Library: (default tab: Server Library)
A file location with folders and files. Provides a fast way to load large volumes of documents into Sintelix.
-
URL library: (default tab: From URLs)
A list of URLs from which to extract text from web pages or files.
-
S3 Bucket: (optional)
The S3 library allows you to ingest documents from an AWS S3 Bucket.
-
Email: (optional)
The Email Library allows you to ingest emails from mail servers.
-
AppFileStore: (optional)
The AppFileStore Library is a special library used by Sintelix Apps. It is similar to a File System Library and is only installed when running a Sintelix App. For more information, refer to the App documentation.
Adding Libraries
You can have more than one library of any type. For example, you may configure three file system libraries, if required.
When you add additional libraries, they appear as additional tabs in the Add Documents panel using the name assigned to the library.
Modify libraries.xml
To add libraries or add security to libraries you need to modify the libraries.xml file in the Sintelix database folder and then restart Sintelix.
Modify the Libraries.xml
To create additional libraries and/or add cache capability to a UrlSystem library, you need to:
- open the libraries.xml file located at the root of the Sintelix database folder
- edit the file as required (see examples of each library type below) and save the changes, and
- restart Sintelix (see Start, Stop and Restart Sintelix)
Result : Once Sintelix is restarted, the new tab will appear in the Add Documents panel.
File System Library
The File System library has the following xml syntax:
-
Class=
library:FileSystem:-
<rootpath>(required): A FileSystem library requires a rootpath defined to identify the location of the library. That location requires Sintelix to have read access. -
<SecurityMetadata>(optional): To add user and/or group security to a Server Library. See Securing a Library
-
Example: Adding a FileSystem Library
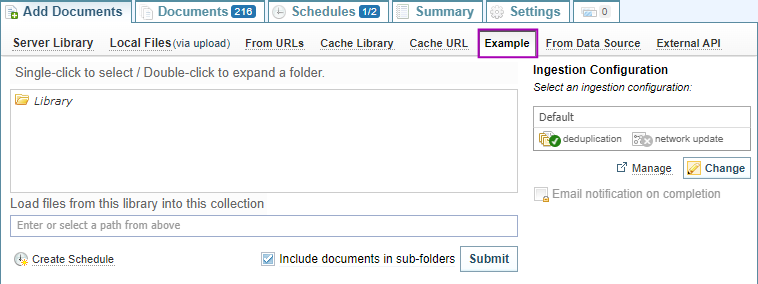
For example, this XML instruction creates a new FileSystem library and adds an Example tab on the Add Documents panel.
<library name="Example" class="library:FileSystem">
  <rootpath>C:\SintelixExample</rootpath>
</library>
Screen example:
Adding the above XML to libraries.xml created a new FileSystem library and tab called Example, as shown below:
Securing a Library
You can add security settings to a File System library and an S3 library.
How it works
To be able to ingest a document from a secured library:
-
The user must have sufficient claims to be able to access the library
-
The project that the user is ingesting the document into must have the same or stricter security metadata than the library - this is protect a user from ingesting a document into an unsecured project or a project with looser permissions.
When a user does not have sufficient claims, they will not be able to see the library in the Sintelix User Interface.
Example: Add Security to a FileSystem library
To add security to a library, add the Security Metadata schema to the libraries.xml file, as illustrated below.
<library name="Custom Library" class="library:FileSystem">
  <rootpath>C:/DemoDocuments</rootpath>
  <SecurityMetadata mode="SECURED">
    <properties>
      <entry>
        <key>users</key>
          <value>
            <item>username1</item>
            <item>username2</item>
          </value>
        </entry>
      <entry>
        <key>groups</key>
          <value>
            <item>groupname1</item>
          </value>
      </entry>
    </properties>
  </SecurityMetadata>
</library>
URL List Library
You can add additional URL Libraries.
To add a URL List library use the following syntax:
-
Class:
<UrlSystem>A system library used to add documents from a URL.-
<cachepath>(optional): A UrlSystem library can include a location for storing cached files to reduce the need to repeatedly download files previously downloaded. The cachepath location requires read/write access. -
<SafeMode>(optional): SafeMode is only required if you create a cache with a URL library. There are no controls over what a user can download from a URL, which is a risk. Disguises the filenames stored in the cache folder. For example, a user cannot identify an exe file.
-
Example: Adding a URL Library
The example below shows the syntax for creating a URL library with no cache.
<library name="URL Example" class="library:UrlSystem">
</library>
Example: Adding a URL Library with a Cache
The example below shows the syntax for creating a URL library with a <cachepath> and <SafeMode> enabled.
When cache capability is added to a UrlSystem library, the files are stored in the allocated location, e.g. c:\SintelixURLCache.
<library name="Cache URL" class="library:UrlSystem">
   <safeMode>true</safeMode>
   <cachepath>C:\SintelixURLCache</cachepath>
</library>
Make the Cache visible to Users
However, the Cache location is not visible to the user in the Add Documents panel.
If you want to make Cache location visible to the user, it must also be created as a FileSystem library, using the same rootpath as the cachepath.
When you make a Cache location available as a FileSystem library, SafeMode needs to be disabled for the URL library. Otherwise, users will not be able to recognise filenames.
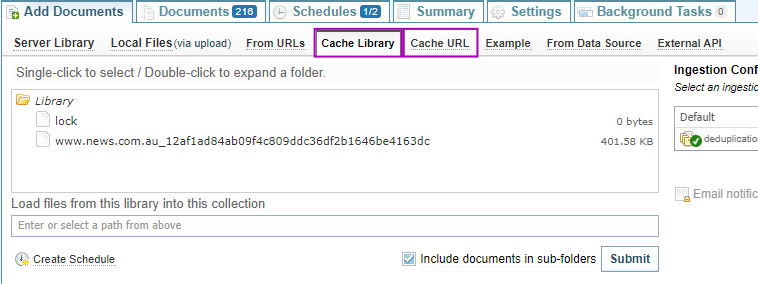
<library name="Cache Library" class="library:FileSystem">
   <rootpath>C:\SintelixURLCache</rootpath>
</library>
Screen example:
Adding the above XML to libraries.xml created a new FileSystem library and tab called Cache Library and a new UrlSystem library with a cache called Cache URL, as shown below:
S3 Bucket Library
The S3 Bucket library has the following xml syntax:
-
Class:
library:S3:You need to indicate what credentials to use when connecting to the S3 library. The credentials are either:
-
<AWSStaticCredentials>: where you also need to provide an<AccessKeyId>and a<SecretAccessKey> -
<AWSInstanceProfileCredentials>to use your existing AWS Instance credentials.
-
Example: Adding an S3 Library with Static Credentials
For example, this XML instruction creates a new S3 library using the <AWSStaticCredentials>.
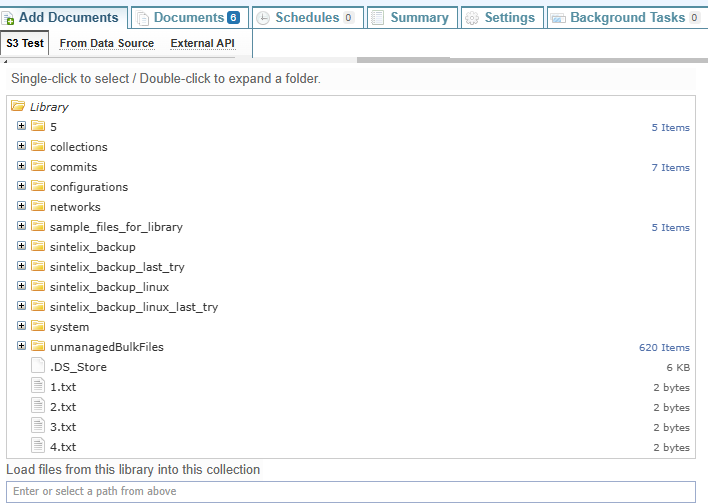
<library name="S3 Test" bucket="customer-s3-bucket" prefix="" region="us-east-1" class="library:S3">
    <AWSStaticCredentials>
      <AccessKeyId></AccessKeyId>
      <SecretAccessKey></SecretAccessKey>
    </AWSStaticCredentials>
  </library>
Screen example:
Adding the above XML to libraries.xml created a new S3 library and tab called S3 Test, as shown below:
Example: Adding an S3 Library with Instance Credentials
For example, this XML instruction creates a new S3 library using the <AWSInstanceProfileCredentials>.
  <library name="S3 Bucket" bucket="customer-s3-bucket" prefix="" region="us-east-1" class="library:S3">
    <AWSInstanceProfileCredentials />
  </library>
Email Library
The Email library has the following xml syntax:
-
class=
library:Email:
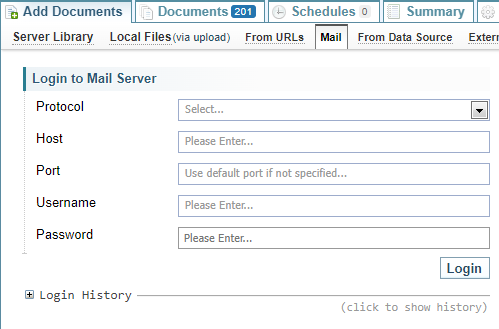
Example: Adding an Email Library
For example, this XML instruction creates a new Email library named Mail.
<library name="Mail" class="library:Email"> </library>Screen example:
Adding the above XML to libraries.xml created a new Email library and tab called Mail, as shown below: